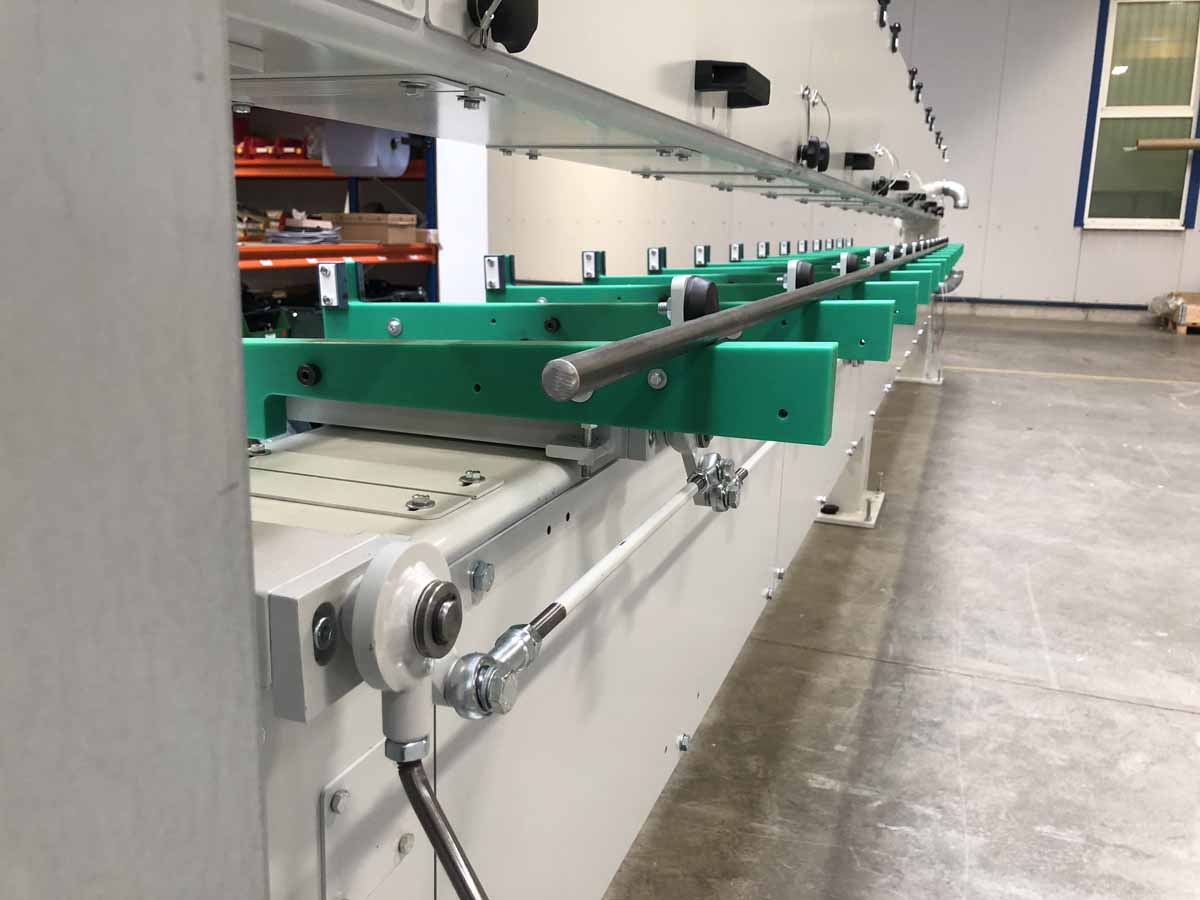
At the TUBE 2020 trade show, sema is going to unveil its new STRAIGHTNESS CHECK X-LINE gauge for inline laser-optical measurement of the straightness of bars and tubes. The new system enables 100 percent inspection without slowing the production cycle. Thanks to its modular design it can be custom-configured to meet an extraordinarily wide range of requirements and applications.
STRAIGHTNESS CHECK X-LINE measures the straightness deviation in mm/m over the complete length of the product. It measures non-contact and in real time, displays the results immediately and stores the measured values for documentation purposes. A complete measuring cycle from the feeding of the product into the gauge and its discharge after the measurement takes just about two seconds. – this means, the measurement does not interfere with the production cycle.
At the trade fair, sema will showcase a system that measures the straightness over the complete product length with three sensors. A thus configured system would be the perfect solution, for example, for users wishing to assure that the material is within a defined minimum circumscribed circle (MCC) over its complete length.
sema”s product range also includes solutions with much higher resolution relative to the product length. Up to 16, synchronously measuring sensors can be distributed along the length of a product – arranged 500 mm apart, for example. Systems of this design even detect deviations existing only over a certain stretch of the product length – for example, bends at bar ends.
Unlike random – and extremely time-consuming – tactile measurements, automatic inline measurements enable the quality inspection of each individual bar or tube. In this way, it is even possible to decide at a very early stage of the production chain, whether it would economically rational to further process products detected as out-of-spec. The software identifies material that does not comply with the specified quality requirements and triggers signals for the automatic bar sorting system arranged downstream to react accordingly. This results in higher plant efficiency and less scrap.
STRAIGHTNESS CHECK X-LINE can handle tubes and bars with diameters of up to 140 mm and lengths of up to 8,000 mm. Also customized solutions are available.
The gauges are usually arranged at the entry end of production lines where they check the quality of the feed material. Or they may be positioned at the end of the process chain – downstream of drawing machines, for example, or after straightening or cut-to-length lines. In either case, they enhance process security and the efficiency of the production plants. The gauges operate with a measuring accuracy of up to 0.1 mm/m.
According to Michael Braetz, Managing Partner of sema, optical straightness measurement provides great potential for efficiency improvement: “The earlier in the production chain our systems are used, the earlier the operator will be able to decide whether or not it would be economically rational to leave a product in the production chain. Thanks to the measuring frame”s small width of only about 30 cm, the gauges can be easily retrofitted to existing production lines.”
The technology in detail
In the STRAIGHTNESS CHECK X-LINE system, sema combines its competence as a full-line plant and equipment supplier with LAP”s expertise in laser technology and in the analysis of measured values.
The new gauge is based on LAP”s METIS Laser Scan micrometers, which measure the position of profiles while they roll through the measuring field over a slide.
The software calculates the straightness from data acquired during a minimum of three sectional planes. The straightness – given in mm per one reference meter – is displayed in numerical and graphical form.
As rounds are in a rotational movement during the measurement, the sensors capture their entire circumference. From this, the system calculates the minimum and the maximum diameters, and the ovality.
Thanks to the wide measuring range, the gauges can handle complete product ranges without having to be reset for product changes.
The data is stored by order numbers and retrievable for additional future analyses. In the charge statistics, for example, the total number of measured bars and the number of out-of-spec bars are separately shown.
sema at the TUBE/WIRE 2020
Düsseldorf, Germany, 30 March to 3 April 2020:
sema: Hall 6 / Stand C23
LAP: Hall 7a, Stand E16


